
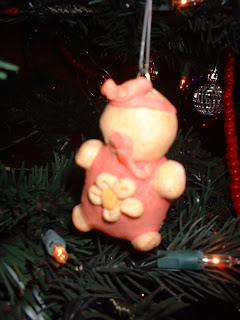
I love these. I generally don’t consider myself a crafty person, but these make me feel crafty.
Ingredients:2 cups flour
1 cup salt
1 cup water
Directions:
1. Mix salt and flour.
2. Add in half the water, then gradually add the remaining water.
3. Knead until the dough is smooth, this can take up to 10 minutes.
4. Place dough in a Ziploc bag with the air squeezed out, or wrap it tightly in saran wrap until you’re ready to use it.

At first it will look like this, but if you keep rolling, it will eventually look even.
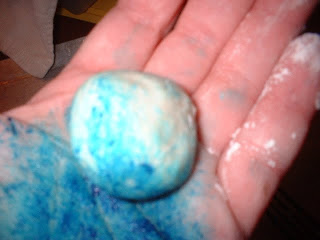
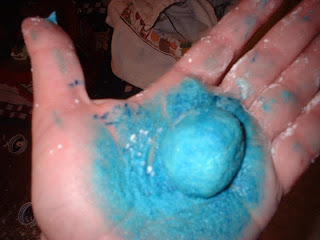 Helpful hint: Don’t do this on the day you’re supposed to play Mary at church, unless you think Mary should have blue hands.
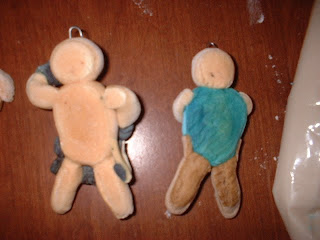
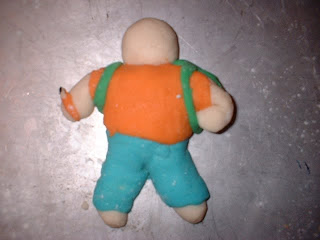
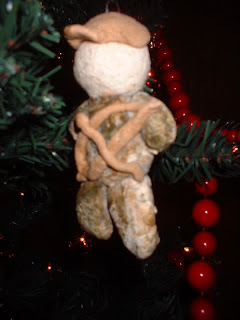
You can choose whether or not you want to make the body, and then lay the clothes on top of it, or color the body itself to cut out a step. I’ve done it both ways. I like the look of the clothes and body being separate. This back view shows the difference.
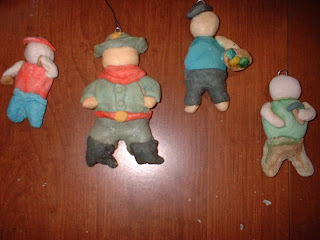
Then decide on something that would identify your child for the past year. These three are ones I have made for my oldest son. The one on the left is from the first year I did this. He was three and loved to play football. In the middle was the year he was particularly obsessed with boxing (it’s my favorite). The last one is last year, the year he started reading chapter books. He was reading Magic Tree House books like crazy. It kind of looks like a carrot on the cover of his book, but it’s a tree. I promise.

On the left is the first one I made of my second son, when he was just over a year old. He’s eating cookies. The next one was the year that he had a cowboy-themed birthday party. The others are an artist and a builder, both of which could define him any year.
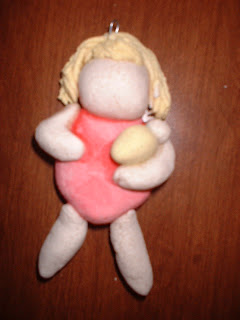
For girls, I use a garlic press to make the hair. I usually leave the boys bald.
 This year, my kindergartner wanted his to have a backpack and a pencil since it’s his first year of school.
The great thing about this is that the kids can make their own while you’re doing it. You could roll the dough out and let them use cookie cutters, or they could just make their own versions of what you’re doing. My 6yo wanted to make a snowman, but my 7yo wanted to make his own ornament of “him” this year, wearing his cub scout uniform.
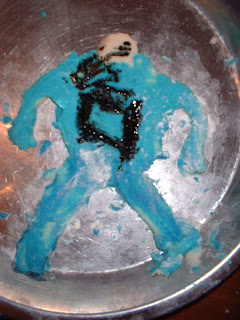

This is my husband. I made him the first year, but now I generally just do the kids. He’s in camo with a bow-and-arrow. The lady who taught me to do this said that she made an ornament of her daughter-in-law the year she was pregnant! So cute!
 When they’re done, cut off the top of a paperclip with wire-cutters, and stick it in the top of their head, and bake them for 1-2 hours at 225. They’re done when they easily come off with an egg-turner. If they’re still sticking, they’re probably not done yet. Keep an eye on them, as I have burned them before. Believe me, there’s a lot of guilt involved when you overcook your children.
After they’re cooled, spray them with clear varnish, the shinier the better.
For the cost of flour, salt, and food coloring (most of which you already have) you can have a set of incredibly meaningful ornaments. As I said before, I am generally not a crafty person, but I love to see my kids faces when they see their ornament for the year. They beam when they figure out what thing I’ve decided on to show their personality.
Doesn’t everyone feel good when they’re noticed?
Check out lots of great Under 10$ gift ideas at Frugal Friday.
How cute are those? What a great and fun way to make ornaments that really mean something!
Oh those are too cute! My kids would have a blast doing those!
Thanks for linking up to Frugal Friday – I love these, and I have really enjoyed clicking around your blog! (That is, until a glass of water got spilled on my laptop. Because, um, the kitchen table was too cluttered. Here's hoping it dries out so I can come back soon!) I linked to your post on my weekly roundup – thanks so much!
This is such a great idea — and you did a great job on yours.
HI!! I just found your blog via Pinterest, and I’m diligently reading through from beginning to end…. You are inspiring with your honesty, and persistence… I just had to comment on this post because of your comment about the guilt associated with overcooking your children. I literally LAUGHED OUT LOUD. Can’t wait to keep reading to see what you accomplish. 🙂
Hee hee. Your comment made me go back and read this post!
Thanks!!
hehe… I am sitting here at almost 11 at night laughing about your comment…”Believe me, there’s a lot of guilt involved when you overcook your children.”… omgosh soo funny…. and thank you for this awesome idea… I have play-doh that I made with my girls a while back (edible kool-aid playdoh) (1 year olds eat ANYTHING)…lol…. and this will be a fun activity for them to help me with… they are wayyy more crafty than me….
This is such a cute idea! Every Christmas, I think about how neat it would be to have some kind of meaningful ornaments for the kids. I just may have found it!
I love this! I’m going to do this with my boys. Such a great idea! Thanks!
this was on wfmw at one point and that is how I found you…read the whole thing from start to finish after that…
Love it!
me again..lol…..so do you still make these??
We didn’t for a few years, but did last year! So fun! And the kids are old enough now to really make some fun things on their own.
“Believe me, there’s a lot of guilt involved when you overcook your children.” I just had to tell you that my office mates just didn’t get why I was giggling so hard at that line…
Thanks… 🙂
Love this!